CI with Jenkins, MSBuild, Nuget and Git part 4
Marco Franssen /
4 min read • 623 words

In part 1, 2 and 3 I showed you how to create a simple MSBuild script and how to execute it from the command line. We had a look at how to clean your output directories, download the Nuget packages, compile your code, run MSpec tests and creating a code coverage report. In this last part of this series I will show you how to integrate it with Jenkins.
First of all we want Jenkins to pull the latest code from Github as soon as somebody has pushed new code to Github. To do this we need to install the Github plugin in Jenkins. We will also install the "MSBuild plugin" in Jenkins to be able to use MSBuild in Jenkins and the "Html publisher plugin" to publish the Coverage and MSpec reports. Also install the "Jenkins Git plugin" to configure the repository in Jenkins.
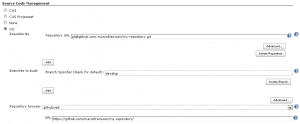
When we have installed the plugins we can create a new project in Jenkins. In the "source code management" part of the project we define our Git repository. In the example I specified only the develop branch should be built.

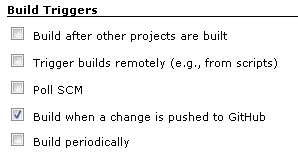
We will trigger the build as soon as changes are pushed to Github.

As soon as the build is triggered it should execute the MSBuild script. Assume our project is a .NET 4 project and our build script is located in the root of our Github repository we can use following settings to execute the build script.

As the target we choose the CI target. This target will execute multiple other targets at once. We will add this target to the MSBuild script. The target will first load the Nuget packages, then clean the output folders, then compile the code and last but not least run the code coverage report and tests.
<Target Name="CI" DependsOnTargets="LoadNuGetPackages;Clean;Compile;CodeCoverage;Specs"></Target>The last thing we add is the post build action to publish the reports. In part 3 we made the MSpec and coverage target output to the reports folder. To show both reports in Jenkins we can add them as a post build action using the "Html publisher plugin".

The build project should now be OK. There are only a few things left to make it work. First of all we need to generate an ssh key which can be added as a deploy key to our Github repository. This will be used by Jenkins to pull the code to the workspace.
The key has to be added to the C:\Windows\SysWOW64\config\systemprofile\.ssh (the “Local System account” home). For a more detailed description on how to create the ssh key go to following webpage http://git-scm.com/book/en/Git-on-the-Server-Generating-Your-SSH-Public-Key. Don't forget to add the public key to the deploy keys on Github.
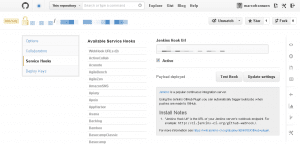
The next step is to enable the Service hook on Github. Fill in the Jenkins hook url and click the "Test Hook" button. On your Jenkins server a build should be triggered.

I hope this blog series where helpful for you and be a good starting point to extend your continuous build process with even more automated build tasks. Please share the series with your friends and let me know if you run into any issues.

