Use the ACME DNS-Challenge to get a TLS certificate
Marco Franssen /
9 min read • 1730 words

In my previous 2 blogs I have shown you how to build a HTTP/2 webserver. In these blogs we have covered self signed TLS certificates as well retrieving a Certificate via Letsencrypt. I mentioned there you will have to expose your server publicly on the internet. However I now figured out there is another way. So please continue reading.
Let's Encrypt is a free, automated, and open certificate authority brought to you by the nonprofit Internet Security Research Group (ISRG).
Letsencrypt implements the ACME (Automated Certificate Management environment) protocol. In the ACME protocol there are 4 challenge types defined. Let's go briefly over these challenge types, so we can relate this back to my previous blogs before we are going to use the DNS challenge type.
HTTP-01 challenge
This challenge can only be performed on port 80. The client will temporarely place a file on the webserver in the following path.
/.well-known/acme-challenge/<TOKEN>
Once the ACME client tells Letsecrypt the file is there it will be retrieved to authenticate and validate. Upon success you will receive the certificate. For this challenge your webserver has to be publicly reacheable on port 80.
DNS-01 challenge
This challenge requires you to prove the ownership of a domain name. It also allows for issuing wildcard certificates. After receiving a token the client will have to create a DNS TXT record with the following contents.
_acme-challenge.<YOUR_DOMAIN>
Letsencrypt will query for this DNS record. Once verified, the client can issue the certificate. As automation is important there is a large amount of DNS providers that expose an API. For this challenge your webserver does not have to be exposes on the internet, and is therefore very convenient to issue development certificates for a domain you personally own.
TLS-SNI-01 challenge
This challenge was defined in draft versions of ACME. It did a TLS handshake on port 443 and sent a specific SNI header, looking for certificate that contained the token. It was disabled in March 2019 because it was not secure enough. So let's quickly forget about this one.
TLS-ALPN-01 challenge
This challenge can be performed on port 443 over TLS only. This challenge is not suitable for most people. It is best suited to authors of TLS-terminating reverse proxies that want to perform host-based validation like HTTP-01, but want to do it entirely at the TLS layer in order to separate concerns.
Recap
So now we know a bit about the different ACME Challenge types lets see what we have used in the previous blog. In this blog we had to publicly expose our webserver to be able to request a certificate. The main reason for this is that the golang.org/x/crypto/acme/autocert does not offer the DNS-01 challenge implementation. We have been using the HTTP-01 challenge on this server to get our certificate.
So now lets focus on how we can issue a certificate via the DNS-01 challenge type. As a fan of the Go programming language I found a bunch of other libraries and tools implementing the ACME protocol. These do implement the DNS-01 challenge type.
Lego
Lego can be used both as a cli tool or as a library in your own code. Lego supports a whole bunch of DNS providers.
Certmagic
Certmagic is the library used in the Caddy webserver. To make use of the DNS-01 challenge also certmagic supports the Lego DNS providers.
Example
In this blog I will show you a small example using the Lego cli to issue a certificate for your domain. I'm utilizing for that the Gandi Live DNS (v5) as a DNS Provider.
First I will install Lego from sources using Go. Please note you will require Go 1.12+.
$ GO111MODULE=on go get -u github.com/go-acme/lego/v3/cmd/lego
go: found github.com/go-acme/lego/v3/cmd/lego in github.com/go-acme/lego/v3 v3.5.0
...
...
...
$ lego -h
NAME:
   lego - Let's Encrypt client written in Go

USAGE:
   lego [global options] command [command options] [arguments...]

VERSION:
   dev

COMMANDS:
   run      Register an account, then create and install a certificate
   revoke   Revoke a certificate
   renew    Renew a certificate
   dnshelp  Shows additional help for the '--dns' global option
   list     Display certificates and accounts information.
   help, h  Shows a list of commands or help for one command
...
...
...
If you don't have Go installed on your machine, there is also a Docker container available.
$ docker run goacme/lego -h
NAME:
   lego - Let's Encrypt client written in Go

USAGE:
   lego [global options] command [command options] [arguments...]

VERSION:
   v3.5.0

COMMANDS:
   run      Register an account, then create and install a certificate
   revoke   Revoke a certificate
   renew    Renew a certificate
   dnshelp  Shows additional help for the '--dns' global option
   list     Display certificates and accounts information.
   help, h  Shows a list of commands or help for one command
...
...
...
For my Gandi Live DNS, I will have to provide my Gandi API Key to be able to communicate with their API. In below example I show you a dummy key, so don't expect this to work for you.
$ export GANDIV5_API_KEY=G4nD1v5L1v3DNSDummyK3y
$ lego --dns gandiv5 -d marcofranssen.nl -d '*.marcofranssen.nl' -a -m [email protected] run
2020/04/11 13:31:42 No key found for account [email protected]. Generating a P384 key.
2020/04/11 13:31:42 Saved key to /Users/marco/.lego/accounts/acme-v02.api.letsencrypt.org/[email protected]/keys/[email protected]
2020/04/11 13:31:43 [INFO] acme: Registering account for [email protected]
!!!! HEADS UP !!!!

    Your account credentials have been saved in your Let's Encrypt
    configuration directory at "/Users/marco/.lego/accounts".
    You should make a secure backup of this folder now. This
    configuration directory will also contain certificates and
    private keys obtained from Let's Encrypt so making regular
    backups of this folder is ideal.

2020/04/11 13:36:11 [INFO] [mac-dev.marcofranssen.nl] acme: Obtaining bundled SAN certificate
2020/04/11 13:36:12 [INFO] [mac-dev.marcofranssen.nl] AuthURL: https://acme-v02.api.letsencrypt.org/acme/authz-v3/3894178945
2020/04/11 13:36:12 [INFO] [mac-dev.marcofranssen.nl] acme: Could not find solver for: tls-alpn-01
2020/04/11 13:36:12 [INFO] [mac-dev.marcofranssen.nl] acme: Could not find solver for: http-01
2020/04/11 13:36:12 [INFO] [mac-dev.marcofranssen.nl] acme: use dns-01 solver
2020/04/11 13:36:12 [INFO] [mac-dev.marcofranssen.nl] acme: Preparing to solve DNS-01
2020/04/11 13:36:13 [INFO] API response: DNS Record Created
2020/04/11 13:36:13 [INFO] [mac-dev.marcofranssen.nl] acme: Trying to solve DNS-01
2020/04/11 13:36:13 [INFO] [mac-dev.marcofranssen.nl] acme: Checking DNS record propagation using [8.8.8.8:53 8.8.4.4:53]
2020/04/11 13:36:13 [INFO] Wait for propagation [timeout: 20m0s, interval: 20s]
2020/04/11 13:36:14 [INFO] [mac-dev.marcofranssen.nl] acme: Waiting for DNS record propagation.
2020/04/11 13:36:34 [INFO] [mac-dev.marcofranssen.nl] acme: Waiting for DNS record propagation.
2020/04/11 13:36:54 [INFO] [mac-dev.marcofranssen.nl] acme: Waiting for DNS record propagation.
2020/04/11 13:37:14 [INFO] [mac-dev.marcofranssen.nl] acme: Waiting for DNS record propagation.
2020/04/11 13:37:41 [INFO] [mac-dev.marcofranssen.nl] The server validated our request
2020/04/11 13:37:41 [INFO] [mac-dev.marcofranssen.nl] acme: Cleaning DNS-01 challenge
2020/04/11 13:37:41 [INFO] [mac-dev.marcofranssen.nl] acme: Validations succeeded; requesting certificates
2020/04/11 13:37:42 [INFO] [mac-dev.marcofranssen.nl] Server responded with a certificate.
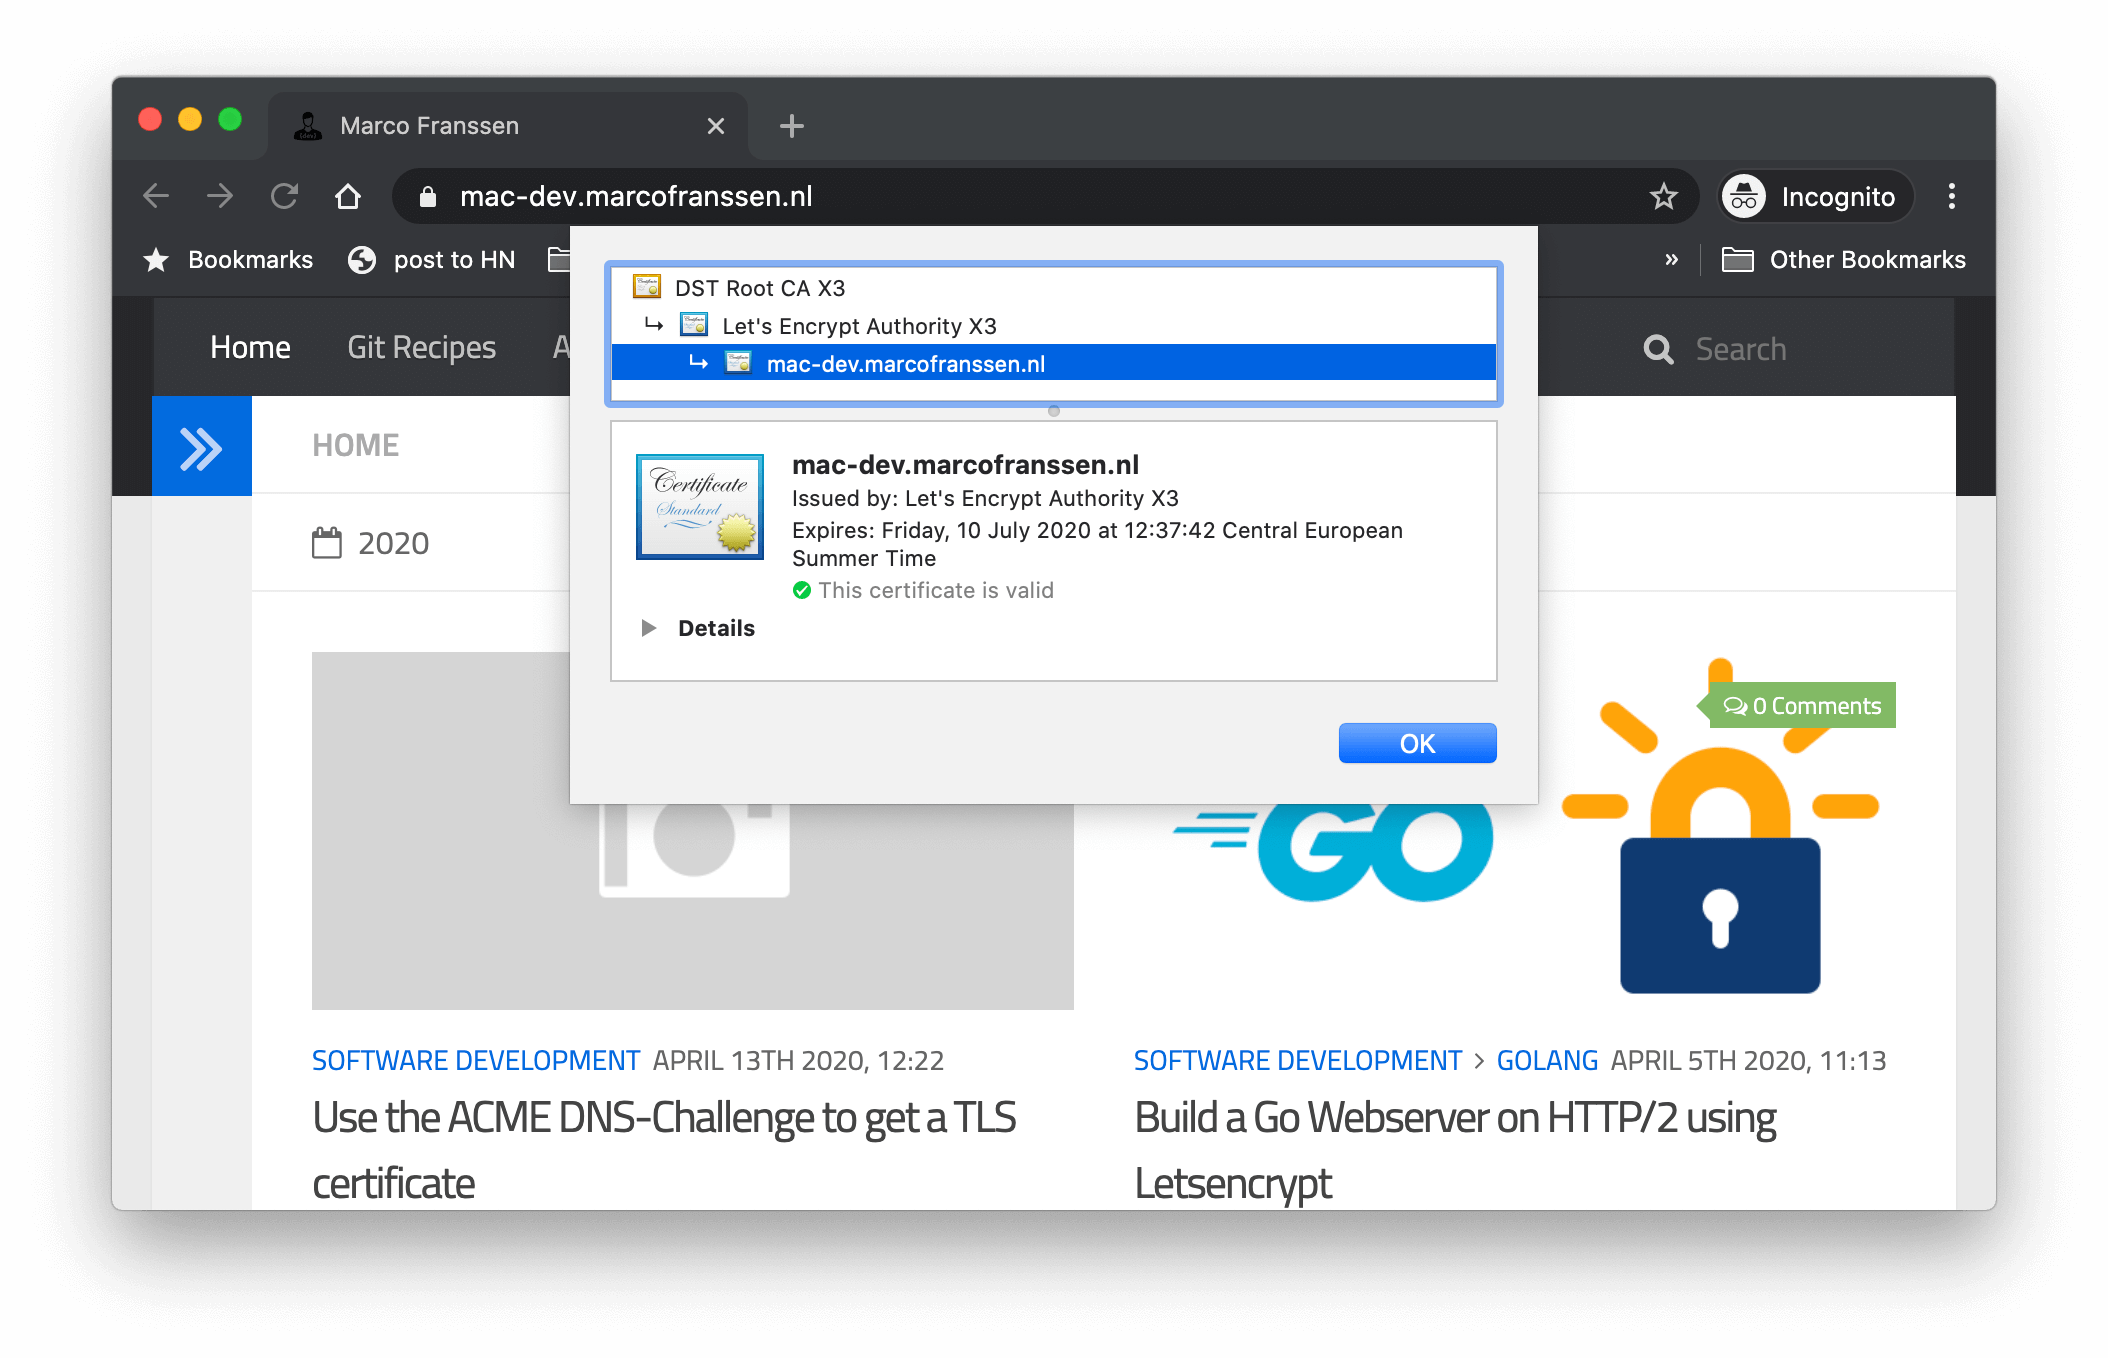
Now lets inspect the certificate we received. Please note there is also a .key file in the same location which you will have to deploy at your webserver. For security reasons I will not share my key over here.
$ cat .lego/certificates/mac-dev.marcofranssen.nl.crt
-----BEGIN CERTIFICATE-----
MIIEuTCCA6GgAwIBAgISBLbVpvyGBSKWR+C/qPw+WAijMA0GCSqGSIb3DQEBCwUA
MEoxCzAJBgNVBAYTAlVTMRYwFAYDVQQKEw1MZXQncyBFbmNyeXB0MSMwIQYDVQQD
ExpMZXQncyBFbmNyeXB0IEF1dGhvcml0eSBYMzAeFw0yMDA0MTExMDM3NDJaFw0y
MDA3MTAxMDM3NDJaMCMxITAfBgNVBAMTGG1hYy1kZXYubWFyY29mcmFuc3Nlbi5u
bDB2MBAGByqGSM49AgEGBSuBBAAiA2IABJVkLy+89NjDUcJ7Ym0tOSODV8h/HrGF
29u7sTbg6yicu4uETIjNn5yNeFXVaz9NfJ39iiwPCkyP6G35g46YNqv5xAlg2uid
Io0jiaR/A4S/JX4loD+U0b2FUxXPCyUwpaOCAmwwggJoMA4GA1UdDwEB/wQEAwIH
gDAdBgNVHSUEFjAUBggrBgEFBQcDAQYIKwYBBQUHAwIwDAYDVR0TAQH/BAIwADAd
BgNVHQ4EFgQUhTdwoXTajiDC0WkwLzIhO/0jV4YwHwYDVR0jBBgwFoAUqEpqYwR9
3brm0Tm3pkVl7/Oo7KEwbwYIKwYBBQUHAQEEYzBhMC4GCCsGAQUFBzABhiJodHRw
Oi8vb2NzcC5pbnQteDMubGV0c2VuY3J5cHQub3JnMC8GCCsGAQUFBzAChiNodHRw
Oi8vY2VydC5pbnQteDMubGV0c2VuY3J5cHQub3JnLzAjBgNVHREEHDAaghhtYWMt
ZGV2Lm1hcmNvZnJhbnNzZW4ubmwwTAYDVR0gBEUwQzAIBgZngQwBAgEwNwYLKwYB
BAGC3xMBAQEwKDAmBggrBgEFBQcCARYaaHR0cDovL2Nwcy5sZXRzZW5jcnlwdC5v
cmcwggEDBgorBgEEAdZ5AgQCBIH0BIHxAO8AdgDwlaRZ8gDRgkAQLS+TiI6tS/4d
R+OZ4dA0prCoqo6ycwAAAXFpB/hLAAAEAwBHMEUCIGngr8eDf1aGEuueWIzdx8GV
JGY5WhMOCM15Ij6VwJ29AiEA9WBTGf8xg3SoQXN3Sjgy/fYZu3Cs2lphHg3v0B4h
tH8AdQCyHgXMi6LNiiBOh2b5K7mKJSBna9r6cOeySVMt74uQXgAAAXFpB/g/AAAE
AwBGMEQCIEeoOJrnb1UH0XIorYLz9koKp4j0GVgqYgRvnTT517bnAiBgcrTEnvKw
tCe7R3Ci9XS8dcJDjQVXTEs4rPV4gCRW8TANBgkqhkiG9w0BAQsFAAOCAQEATcqt
lugYm7/7Z1R/IvBWct3E/bapMAhVz7alsClVeZHuv2vSX2LPgTp8ZXcgnf5RsXTw
iYJ/ZXhEtUwQfrPYGWYuXeINEbQ2hjKivGLYrWRfHw2MEC/R7Z1/5t6ODtUuYYbr
EHtCJ1I5XmmnqQvSoRBjbY1WtYskIZV2i1mk8eJv6z1FpBBkrrGFUaEXrw2HIBo1
K4zXwfxdnAb0PuBCVf+ds+EORhlMUWKf0yfSq9oAhZoitm4hS4BFC2ey8Y2dmuI9
I/EeVnxDPBFwWQ1Sbhinu0o1kjdYM2zO1nPZJjjyUDYJ+7Utq1zjvY7vENL7pmr/
pGu3XUZC2cD8LZRFkg==
-----END CERTIFICATE-----

-----BEGIN CERTIFICATE-----
MIIEkjCCA3qgAwIBAgIQCgFBQgAAAVOFc2oLheynCDANBgkqhkiG9w0BAQsFADA/
MSQwIgYDVQQKExtEaWdpdGFsIFNpZ25hdHVyZSBUcnVzdCBDby4xFzAVBgNVBAMT
DkRTVCBSb290IENBIFgzMB4XDTE2MDMxNzE2NDA0NloXDTIxMDMxNzE2NDA0Nlow
SjELMAkGA1UEBhMCVVMxFjAUBgNVBAoTDUxldCdzIEVuY3J5cHQxIzAhBgNVBAMT
GkxldCdzIEVuY3J5cHQgQXV0aG9yaXR5IFgzMIIBIjANBgkqhkiG9w0BAQEFAAOC
AQ8AMIIBCgKCAQEAnNMM8FrlLke3cl03g7NoYzDq1zUmGSXhvb418XCSL7e4S0EF
q6meNQhY7LEqxGiHC6PjdeTm86dicbp5gWAf15Gan/PQeGdxyGkOlZHP/uaZ6WA8
SMx+yk13EiSdRxta67nsHjcAHJyse6cF6s5K671B5TaYucv9bTyWaN8jKkKQDIZ0
Z8h/pZq4UmEUEz9l6YKHy9v6Dlb2honzhT+Xhq+w3Brvaw2VFn3EK6BlspkENnWA
a6xK8xuQSXgvopZPKiAlKQTGdMDQMc2PMTiVFrqoM7hD8bEfwzB/onkxEz0tNvjj
/PIzark5McWvxI0NHWQWM6r6hCm21AvA2H3DkwIDAQABo4IBfTCCAXkwEgYDVR0T
AQH/BAgwBgEB/wIBADAOBgNVHQ8BAf8EBAMCAYYwfwYIKwYBBQUHAQEEczBxMDIG
CCsGAQUFBzABhiZodHRwOi8vaXNyZy50cnVzdGlkLm9jc3AuaWRlbnRydXN0LmNv
bTA7BggrBgEFBQcwAoYvaHR0cDovL2FwcHMuaWRlbnRydXN0LmNvbS9yb290cy9k
c3Ryb290Y2F4My5wN2MwHwYDVR0jBBgwFoAUxKexpHsscfrb4UuQdf/EFWCFiRAw
VAYDVR0gBE0wSzAIBgZngQwBAgEwPwYLKwYBBAGC3xMBAQEwMDAuBggrBgEFBQcC
ARYiaHR0cDovL2Nwcy5yb290LXgxLmxldHNlbmNyeXB0Lm9yZzA8BgNVHR8ENTAz
MDGgL6AthitodHRwOi8vY3JsLmlkZW50cnVzdC5jb20vRFNUUk9PVENBWDNDUkwu
Y3JsMB0GA1UdDgQWBBSoSmpjBH3duubRObemRWXv86jsoTANBgkqhkiG9w0BAQsF
AAOCAQEA3TPXEfNjWDjdGBX7CVW+dla5cEilaUcne8IkCJLxWh9KEik3JHRRHGJo
uM2VcGfl96S8TihRzZvoroed6ti6WqEBmtzw3Wodatg+VyOeph4EYpr/1wXKtx8/
wApIvJSwtmVi4MFU5aMqrSDE6ea73Mj2tcMyo5jMd6jmeWUHK8so/joWUoHOUgwu
X4Po1QYz+3dszkDqMp4fklxBwXRsW10KXzPMTZ+sOPAveyxindmjkW8lGy+QsRlG
PfZ+G6Z6h7mjem0Y+iWlkYcV4PIWL1iwBi8saCbGS5jN2p8M+X+Q7UNKEkROb3N6
KOqkqm57TH2H3eDJAkSnh6/DNFu0Qg==
-----END CERTIFICATE-----
To inspect the contents of your certificates you can simply run the following openssl command.
$ openssl x509 -in .lego/certificates/mac-dev.marcofranssen.nl.crt -noout -text
Certificate:
    Data:
        Version: 3 (0x2)
        Serial Number:
            04:b6:d5:a6:fc:86:05:22:96:47:e0:bf:a8:fc:3e:58:08:a3
    Signature Algorithm: sha256WithRSAEncryption
        Issuer: C=US, O=Let's Encrypt, CN=Let's Encrypt Authority X3
        Validity
            Not Before: Apr 11 10:37:42 2020 GMT
            Not After : Jul 10 10:37:42 2020 GMT
        Subject: CN=mac-dev.marcofranssen.nl
        Subject Public Key Info:
            Public Key Algorithm: id-ecPublicKey
                Public-Key: (384 bit)
                pub:
                    04:95:64:2f:2f:bc:f4:d8:c3:51:c2:7b:62:6d:2d:
                    39:23:83:57:c8:7f:1e:b1:85:db:db:bb:b1:36:e0:
                    eb:28:9c:bb:8b:84:4c:88:cd:9f:9c:8d:78:55:d5:
                    6b:3f:4d:7c:9d:fd:8a:2c:0f:0a:4c:8f:e8:6d:f9:
                    83:8e:98:36:ab:f9:c4:09:60:da:e8:9d:22:8d:23:
                    89:a4:7f:03:84:bf:25:7e:25:a0:3f:94:d1:bd:85:
                    53:15:cf:0b:25:30:a5
                ASN1 OID: secp384r1
                NIST CURVE: P-384
        X509v3 extensions:
            X509v3 Key Usage: critical
                Digital Signature
            X509v3 Extended Key Usage:
                TLS Web Server Authentication, TLS Web Client Authentication
            X509v3 Basic Constraints: critical
                CA:FALSE
            X509v3 Subject Key Identifier:
                85:37:70:A1:74:DA:8E:20:C2:D1:69:30:2F:32:21:3B:FD:23:57:86
            X509v3 Authority Key Identifier:
                keyid:A8:4A:6A:63:04:7D:DD:BA:E6:D1:39:B7:A6:45:65:EF:F3:A8:EC:A1

            Authority Information Access:
                OCSP - URI:http://ocsp.int-x3.letsencrypt.org
                CA Issuers - URI:http://cert.int-x3.letsencrypt.org/

            X509v3 Subject Alternative Name:
                DNS:mac-dev.marcofranssen.nl
            X509v3 Certificate Policies:
                Policy: 2.23.140.1.2.1
                Policy: 1.3.6.1.4.1.44947.1.1.1
                  CPS: http://cps.letsencrypt.org
Last but not least you can very easily renew your certificate using Lego.
$ lego --dns gandiv5 -d mac-dev.marcofranssen.nl -a -m [email protected] renew
2020/04/11 13:49:23 [mac-dev.marcofranssen.nl] The certificate expires in 89 days, the number of days defined to perform the renewal is 30: no renewal.
Feel free to explore the other options of the cli yourself. There are plenty of DNS providers available.
Last but not least you will have to update your /etc/hosts file to use the certificate on your laptop during development.
127.0.0.1 mac-dev.marcofranssen.nlThis allows me to navigate to my webserver running on localhost using https://mac-dev.marcofranssen.n. See my other 2 blogs on how to build a webserver in Go running on HTTPS or a webserver using Nginx. Simply use the crt and key file we just received via Letsencrypt.
Last but not least you will also find a reference to Traefik. Also Traefik makes use of Lego to be able to get your certificates in Traefik.
References
- Build a Go Webserver on HTTP/2 using Letsencrypt
- React Router and Nginx over HTTP/2
- Letsencrypt
- Acme Challenge types
- Let’s Encrypt client and ACME library written in Go
- Lego DNS providers
- Certmagic: Easy and Powerful TLS Automation
- Caddy Server
- Traefik
Thanks for reading my blog, don't forget to share with your friends and colleagues. Together we can make the web a safer place, and this starts with your development, so you can use modern web features such as HTTP/2 and gRPC, which require you to use TLS.


