Install fresh Raspbian image on your Raspberry Pi - part 2
Marco Franssen /
8 min read • 1594 words

In the previous blog of this series I explained the basics of getting a fresh installation of Raspbian on your Rapberry Pi including SSH access and configuration of a static IP for your Wifi. In this blog we are going to have a look at tweaking it a little further to get a better commandline experience and have some more tooling available to operate your Raspberry Pi.
Admin experience and tooling
On any server I will most likely always work with Git and Vim. I have many of my bash scripts and utilities committed and versioned in Git repositories, to be able to easily use them, I want to be able to clone these Git repositories. Secondly my preferred commandline editor of choice is ViM, for which I also have a nice configuration in Git with nice theming and coding plugins.
I also make some tweaks to my bash shell to improve the convenience of using it.
Lets start with installing Git and ViM.
sudo apt install -y git vimViM
The first thing I always want to do is configure my ViM to have a similar experience on all servers I'm accessing. For that I made a shell script which is publicly available for you and can easily be installed by making a curl request and pipe it to bash as following.
curl -sS https://raw.githubusercontent.com/marcofranssen/dotfiles/master/install_plugins_vim.sh | bashGit
Next I always want to have Git available which allows me to pull my repositories with my scripts etc. Me was not me if I wouldn't have a config for my Git setup as well.
curl -sSo ~/.gitconfig https://raw.githubusercontent.com/marcofranssen/dotfiles/master/.gitconfig
GIT_EMAIL=[email protected]
git config --global user.name="Marco Franssen"
git config --global user.email=$GIT_EMAIL
sed -i "s/AUTHOR_EMAIL/$GIT_EMAIL/" ~/.gitconfig
My Git config has some nice aliases available to speed up my Git commandline experience.
Bash improvements
To improve the experience with arrow-up and arrow-down keys in bash I always apply following .inputrc.
curl -sSo ~/.inputrc https://raw.githubusercontent.com/marcofranssen/dotfiles/master/.inputrcMount NFS shares
As your Raspberry doesn't have a lot of storage capacity on the SD card you would have 2 options to have more storage mounted on your Raspberry Pi. First and most easy option would be to connect an external disk to your Raspberry. Second option would be to mount an external volume to your Raspberry Pi. Lets have a look on how to mount an external volume on your Raspberry Pi. Below I will show you an example how I mount my 3 shared folders from my Synology NAS which I will expose to my Raspberry Pi so Kodi can use them. More on Kodi later. In case you need help on setting up NFS shares on your Synology check out this manual.
Assuming we have 3 nfs shares available we make 3 folders on our Raspberry Pi to mount them.
sudo apt install -y nfs-common
sudo mdkir -p /mnt/nfs/{video,music,photo}
Above script first ensures we have the latest nfs-common package installed. Then we create 3 directories for the 3 NFS shares I want to mount.
$ tree -d -L 2 /mnt/
/mnt/
└── nfs
    ├── music
    ├── photo
    └── video
Now having the directories for my mounts available, I will first update /etc/fstab, which takes care of mounting the directories automatically on next boot. I'll also mount the drives now manually so I don't need to reboot.
sudo tee -a /etc/fstab <<EOL
192.168.1.2:/volume1/video    /mnt/nfs/video  nfs     auto,nofail,noatime,nolock,intr,tcp,actimeo=1800 0 0
192.168.1.2:/volume1/music    /mnt/nfs/music  nfs     auto,nofail,noatime,nolock,intr,tcp,actimeo=1800 0 0
192.168.1.2:/volume1/photo    /mnt/nfs/photo  nfs     auto,nofail,noatime,nolock,intr,tcp,actimeo=1800 0 0
EOL
sudo mount /mnt/nfs/video
sudo mount /mnt/nfs/music
sudo mount /mnt/nfs/photo
Ensure to replace above IP address with your own and also adjust the folders to point to the NFS shares you have on your own NAS.
Installing Kodi
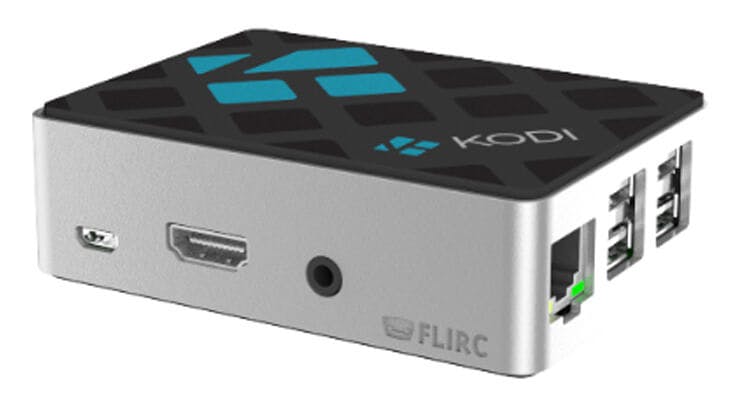
Now I have access to the files on my NAS I'm ready to install Kodi. I will also create a user for Kodi to have a more secure setup.
$ sudo apt install -y kodi
$ sudo adduser --disabled-password --gecos "Kodi Media Center" kodi
Adding user 'kodi' ...
Adding new group 'kodi' (1002) ...
Adding new user 'kodi' (1002) with group 'kodi' ...
Creating home directory '/home/kodi' ...
Copying files from '/etc/skel' ...
$ sudo usermod -aG audio,video,input kodi
Most important is to add Kodi to the audio and video groups so it has permissions to use the audio and video devices, as well add the input group if you want a keyboard to work. More on groups on a Debian based OS can be found here. You might find some guides that also add the user to plugdev, but as I do the nfs mounting outside of Kodi this isn't required. By doing nfs shares on the OS level I also found slight better performance then doing this via Kodi + the advantage of being able to access the shares outside of Kodi.
First thing I want to do is ensure Kodi automatically boots when my Raspberry Pi boots up. For that we will add a systemctl service. Below bash script will create the service file for systemctl.
sudo tee /etc/systemd/system/kodi.service <<EOL
[Unit]
Description = Kodi Media Center

# if you don't need the MySQL DB backend, this should be sufficient
After = systemd-user-sessions.service network.target sound.target

# if you need the MySQL DB backend, use this block instead of the previous
# After = systemd-user-sessions.service network.target sound.target mysql.service
# Wants = mysql.service

[Service]
User = kodi
Group = kodi
Type = simple
ExecStart = /usr/bin/kodi --standalone
Restart = always
RestartSec = 30

[Install]
WantedBy = multi-user.target
EOL
As you can see this service will boot Kodi using the kodi user we created.
Now it is time to enable the kodi service and start Kodi.
$ sudo systemctl daemon-reload
$ sudo systemctl enable kodi
$ sudo systemctl start kodi
$ sudo systemctl status kodi
● kodi.service - Kodi Media Center
   Loaded: loaded (/etc/systemd/system/kodi.service; enabled; vendor preset: enabled)
   Active: active (running) since Thu 2019-08-04 11:17:44 CEST; 6s ago
 Main PID: 8380 (kodi-standalone)
    Tasks: 32 (limit: 4915)
   CGroup: /system.slice/kodi.service
           ├─8380 /bin/sh /usr/bin/kodi-standalone
           ├─8387 /bin/sh /usr/bin/kodi --standalone
           └─8415 /usr/lib/arm-linux-gnueabihf/kodi/kodi-rbpi_v7 --lircdev /var/run/lirc/lircd --standalone

Aug 04 11:17:44 raspberrypi systemd[1]: Started Kodi Media Center.
After a reboot the systemctl service will automatically boot Kodi for you as we enabled the service.
Configure Kodi
Now we have Kodi installed and running we can start to configure Kodi. Although we could do all of this via the GUI I prefer to configure it via the terminal as that makes it faster for me.
I always enable the webserver which allows me to use my Mobile App as a remote control for Kodi. When Kodi starts for the first time, it will create a folder in your home folder named .kodi. In this folder you will find all kind of xml configuration files. As we started Kodi using the kodi user you will find it in /home/kodi/.kodi.
In the guisettings.xml file you will be able to enable the webserver. Below bash command will update the given setting to enable the webserver.
sudo sed -i '/id="services.webserver"/c\    <setting id="services.webserver">true</setting>' /home/kodi/.kodi/userdata/guisettings.xml
sudo sed -i '/id="lookandfeel.skinzoom"/c\    <setting id="lookandfeel.skinzoom">-4</setting>' /home/kodi/.kodi/userdata/guisettings.xml
sudo sed -i '/id="myvideos.extractflags"/c\    <setting id="myvideos.extractflags">true</setting>' /home/kodi/.kodi/userdata/guisettings.xml
sudo sed -i '/id="myvideos.extractthumb"/c\    <setting id="myvideos.extractthumb">true</setting>' /home/kodi/.kodi/userdata/guisettings.xml
sudo sed -i '/id="myvideos.usetags"/c\    <setting id="myvideos.usetags">true</setting>' /home/kodi/.kodi/userdata/guisettings.xml
sudo sed -i '/id="services.airplay"/c\    <setting id="services.airplay">true</setting>' /home/kodi/.kodi/userdata/guisettings.xml
sudo sed -i '/id="services.airplayvideosupport"/c\    <setting id="services.airplayvideosupport">true</setting>' /home/kodi/.kodi/userdata/guisettings.xml
sudo sed -i '/id="videolibrary.groupmoviesets"/c\    <setting id="videolibrary.groupmoviesets">true</setting>' /home/kodi/.kodi/userdata/guisettings.xml
sudo sed -i '/id="videolibrary.tvshowsselectfirstunwatcheditem"/c\    <setting id="videolibrary.tvshowsselectfirstunwatcheditem">true</setting>' /home/kodi/.kodi/userdata/guisettings.xml
sudo sed -i '/id="videolibrary.updateonstartup"/c\    <setting id="videolibrary.updateonstartup">true</setting>' /home/kodi/.kodi/userdata/guisettings.xml
sudo sed -i '/id="weather.addon"/c\    <setting id="weather.addon">weather.yahoo</setting>' /home/kodi/.kodi/userdata/guisettings.xml
You might prefer different settings, but at least this gives you an impression on what you could automate on your personal setup.
Secondly I will configure the Kodi sources.
sudo tee /home/kodi/.kodi/userdata/sources.xml <<EOL
<sources>
    <programs>
        <default pathversion="1"></default>
    </programs>
    <video>
        <default pathversion="1"></default>
        <source>
            <name>Home</name>
            <path pathversion="1">/mnt/nfs/video/Home/</path>
            <allowsharing>true</allowsharing>
        </source>
    </video>
    <music>
        <default pathversion="1"></default>
        <source>
            <name>music</name>
            <path pathversion="1">/mnt/nfs/music/</path>
            <allowsharing>true</allowsharing>
        </source>
    </music>
    <pictures>
        <default pathversion="1"></default>
        <source>
            <name>photo</name>
            <path pathversion="1">/mnt/nfs/photo/</path>
            <allowsharing>true</allowsharing>
        </source>
    </pictures>
    <files>
        <default pathversion="1"></default>
    </files>
    <games>
        <default pathversion="1"></default>
    </games>
</sources>
EOL
sudo chown kodi:kodi /home/kodi/.kodi/userdata/sources.xml
As the sources.xml is freshly created I need to ensure it is owned by the kodi user. With above configuration we have added my music library, my photos and my home video folder as a datasource to Kodi. This allows me to enjoy all my family moments on my TV with some nice music :-). Feel free to add more sources to your Kodi in case you have them. E.g. your TV shows and Movies can be added as well. So now last step is to reboot Kodi once to ensure we have the configurations applied.
$ sudo systemctl restart kodi
$ sudo systemctl status kodi
● kodi.service - Kodi Media Center
   Loaded: loaded (/etc/systemd/system/kodi.service; enabled; vendor preset: enabled)
   Active: active (running) since Thu 2019-08-04 11:23:11 CEST; 5s ago
 Main PID: 8604 (kodi-standalone)
    Tasks: 33 (limit: 4915)
   CGroup: /system.slice/kodi.service
           ├─8604 /bin/sh /usr/bin/kodi-standalone
           ├─8611 /bin/sh /usr/bin/kodi --standalone
           └─8639 /usr/lib/arm-linux-gnueabihf/kodi/kodi-rbpi_v7 --lircdev /var/run/lirc/lircd --standalone

Aug 04 11:23:11 raspberrypi systemd[1]: Started Kodi Media Center.
Thanks for reading this blogpost and enjoy your Kodi setup.


