Ssl certificate for your Azure website using Letsencrypt
Marco Franssen /
6 min read • 1098 words

Letsencrypt is a free automated service which provides you SSL certificates for free. Although the certificates are only valid for 3 months, this shouldn't be a bottleneck as you can fully automate the certificate request and renewal. Letsencrypt comes with a python client which you can use to make a certificate request. Letsencrypt can be ran from a Linux OS.
In this blogpost I will show you how to use the Letsencrypt Vagrant box (Ubuntu vm) to authorize the certification request for your Azure website. To make this work we will setup a reverse proxy for the specific urls Letsencrypt requires for authorizing your certificate request.
For the impatient ones you can go directly to the summary.
Reverse proxy
First lets have a look on how to configure the reverse proxy on our Azure website to handle request ment for Letsencrypt. As we need to be able to have Letsencrypt access the Vagrant box from which we will invoke the certificate request I created a reverse proxy on my Azure website.
Make sure you have the file applicationHost.xtd on your Azure website in the following folder /site. This folder also contains the folder wwwroot.
<?xml version="1.0"?>
<configuration xmlns:xdt="http://schemas.microsoft.com/XML-Document-Transform">
  <system.webServer>
    <proxy xdt:Transform="InsertIfMissing" enabled="true" preserveHostHeader="false" reverseRewriteHostInResponseHeaders="false" />
  </system.webServer>
</configuration>
Make sure you have following config in your web.config, which can be found in the folder /site/wwwroot.
<?xml version="1.0" encoding="UTF-8"?>
<configuration>
  <system.webServer>
    <rewrite>
      <rules>
        <rule name="Letsencrypt" stopProcessing="true">
          <match url="^.well-known/acme-challenge/(.*)" />
          <action type="Rewrite" url="http://{my-home-ip}:9999/.well-known/acme-challenge/{R:1}" />
        </rule>
      </rules>
    </rewrite>
  <system.webServer>
 </configuration>
This rewrite rule will redirect all traffic which is trying to access the path /.well-known/acme-challenge/ to my home ip address on port 9999. In my router I have forwarded this port to the IP address of my laptop. So when I now make a request to https://marcofranssen.nl/.well-known/acme-challenge/ it will actually go to my Letsencrypt Vagrant box which is running on my laptop (well actually not yet, keep on reading ;-)).
Port forwarding
To make sure we can access the Vagrant box later on, we will also need to create a port forwarding rule in our router. Make sure you forward all traffic on port 9999 to port 9999 on your laptop/pc.
Example:
- external port:
9999 - external ip:
0.0.0.0 - local port:
9999 - local ip:
192.168.0.20
So now all requests will end up on your laptop/pc on port 9999.
Letsencrypt Vagrant environment
So now we will make sure we have the Letsencrypt client running on this port. In order to have the Letsencrypt client we will first clone the Letsencrypt repository from github.
git clone [email protected]:letsencrypt/letsencrypt.gitFirst thing we want to do is add the following line to the Vagrantfile to have a port-forwarding rule so all the traffic to our host will be forwarded to the VM. Letsencrypt will try to access some files on this port later on when we do the certificate request.
ubuntu_trusty.vm.network "forwarded_port", guest: 9999, host: 9999, id: "letsencrypt"Now we can simply run the command vagrant up from the letsencrypt folder in your bash/Powershell. This will bootup the VM. Once booted you can do vagrant ssh to enter the VM. In the vm we will change the directory to /vagrant, so we can access the client letsencrypt-auto.
Letsencrypt certificate request
cd /vagrant
./letsencrypt-auto certonly \
    --text \
    --agree-tos \
    --email [email protected] \
    --renew-by-default \
    --standalone \
    --standalone-supported-challenges http-01 \
    --http-01-port 9999 \
    -d marcofranssen.nl
The above command will create a request for a SSL certificate for the domain marcofranssen.nl. You can find the certificate files in the following folder /etc/letsencrypt/live/marcofranssen.nl:
$ sudo ls /etc/letsencrypt/live/marcofranssen.nl
cert.pem  chain.pem  fullchain.pem  privkey.pem
Creating the PFX
As we require an .pfx file for Azure we have to do one more step to create the .pfx certificate file. We also want to be able to get our hands on the pfx later on so we can upload it to Windows Azure. Therefore I add the files in the /vagrant folder so we can grab them from our host inside the letsencrypt folder. (The letsencrypt folder on our host is mapped to the /vagrant folder on our vm)
$ mkdir -p $CERTIFICATES
$ cd $CERTIFICATES
$ sudo openssl pkcs12 -inkey $LE_OUTPUT/$DOMAIN/privkey.pem -in $LE_OUTPUT/$DOMAIN/fullchain.pem -export -out ${DOMAIN}.pfx
Enter Export Password:
Verifying - Enter Export Password:
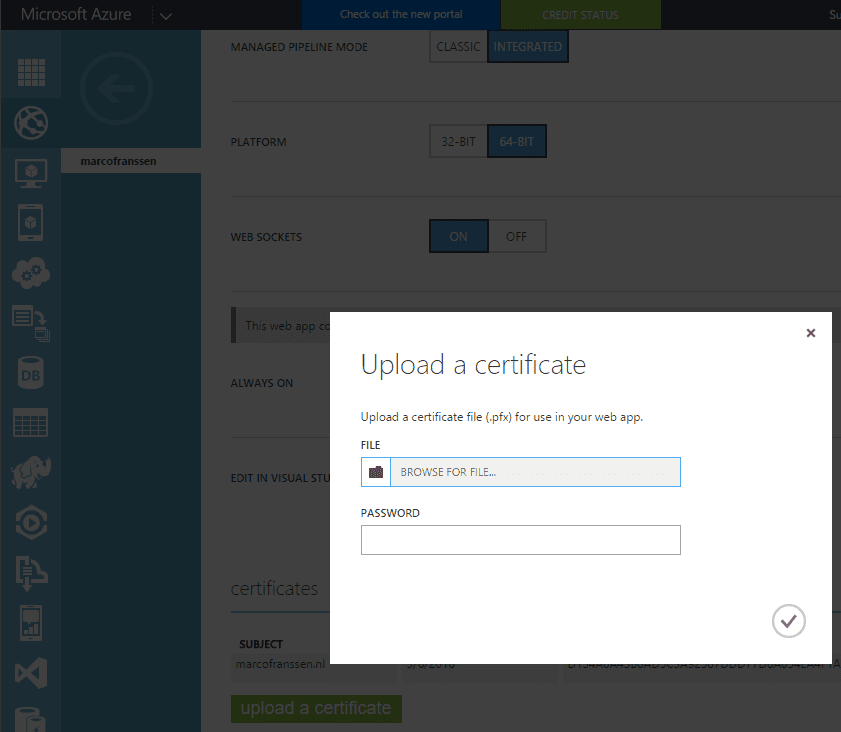
Now we have the pfx we can upload it to Azure to put our certificate in place.

Summary
To summarize we can put all commands in a bash script so we can easily invoke it for all our Azure websites, where we put the reverse proxy in place. Place the file in your letsencrypt folder.
#!/bin/bash
LE_OUTPUT=/etc/letsencrypt/live
CERTIFICATES=/vagrant/certificates
EMAIL=[email protected]
DOMAIN=$1

if [[ -z "$DOMAIN" ]] ; then
    echo Please provide a domain name...
    echo Example:
    echo "  ./letsencrypt-domain.sh marcofranssen.nl"
    echo "  ./letsencrypt-domain.sh subdomain.marcofranssen.nl"
    exit 1
fi

./letsencrypt-auto certonly \
    --text \
    --agree-tos \
    --email $EMAIL \
    --renew-by-default \
    --standalone \
    --standalone-supported-challenges http-01 \
    --http-01-port 9999 \
    -d $DOMAIN

mkdir -p $CERTIFICATES
cd $CERTIFICATES
sudo openssl pkcs12 -inkey $LE_OUTPUT/$DOMAIN/privkey.pem -in $LE_OUTPUT/$DOMAIN/fullchain.pem -export -out ${DOMAIN}.pfx
Unfortunately I didn't find a way to automatically upload the certificate to Azure. Otherwise we also could have added this using curl to the script.
So basically your workflow to renew your certificates will be.
$ cd /c/letsencrypt
$ vagrant up
$ vagrant ssh
$ cd /vagrant
$ ./letsencrypt-domain.sh marcofranssen.nl
Enter Export Password:
Verifying - Enter Export Password:
$ ./letsencrypt-domain.sh subdomain.marcofranssen.nl
Enter Export Password:
Verifying - Enter Export Password:
$ ./letsencrypt-domain.sh someotherdomain.nl
Enter Export Password:
Verifying - Enter Export Password:
$ exit
$ vagrant halt
Now you can find your certificates in: c:\letsencrypt\certificates (assuming you cloned the letsencrypt repository in c:\). Upload them to your Azure website and you are done…
*** Bonus ***
For Apache, Nginx and HAProxy you can simply put the fullchain.pem in place. I would like to challenge you to add the bash commands in place to copy paste the fullchain.pem to your webserver (Apache, Nginx, HAProxy) and reboot the webserver using the appropriate command, once you put the files in place. So for those kind of webservers you can actually have it fully automated without the need to run Letsencrypt on those servers.


